
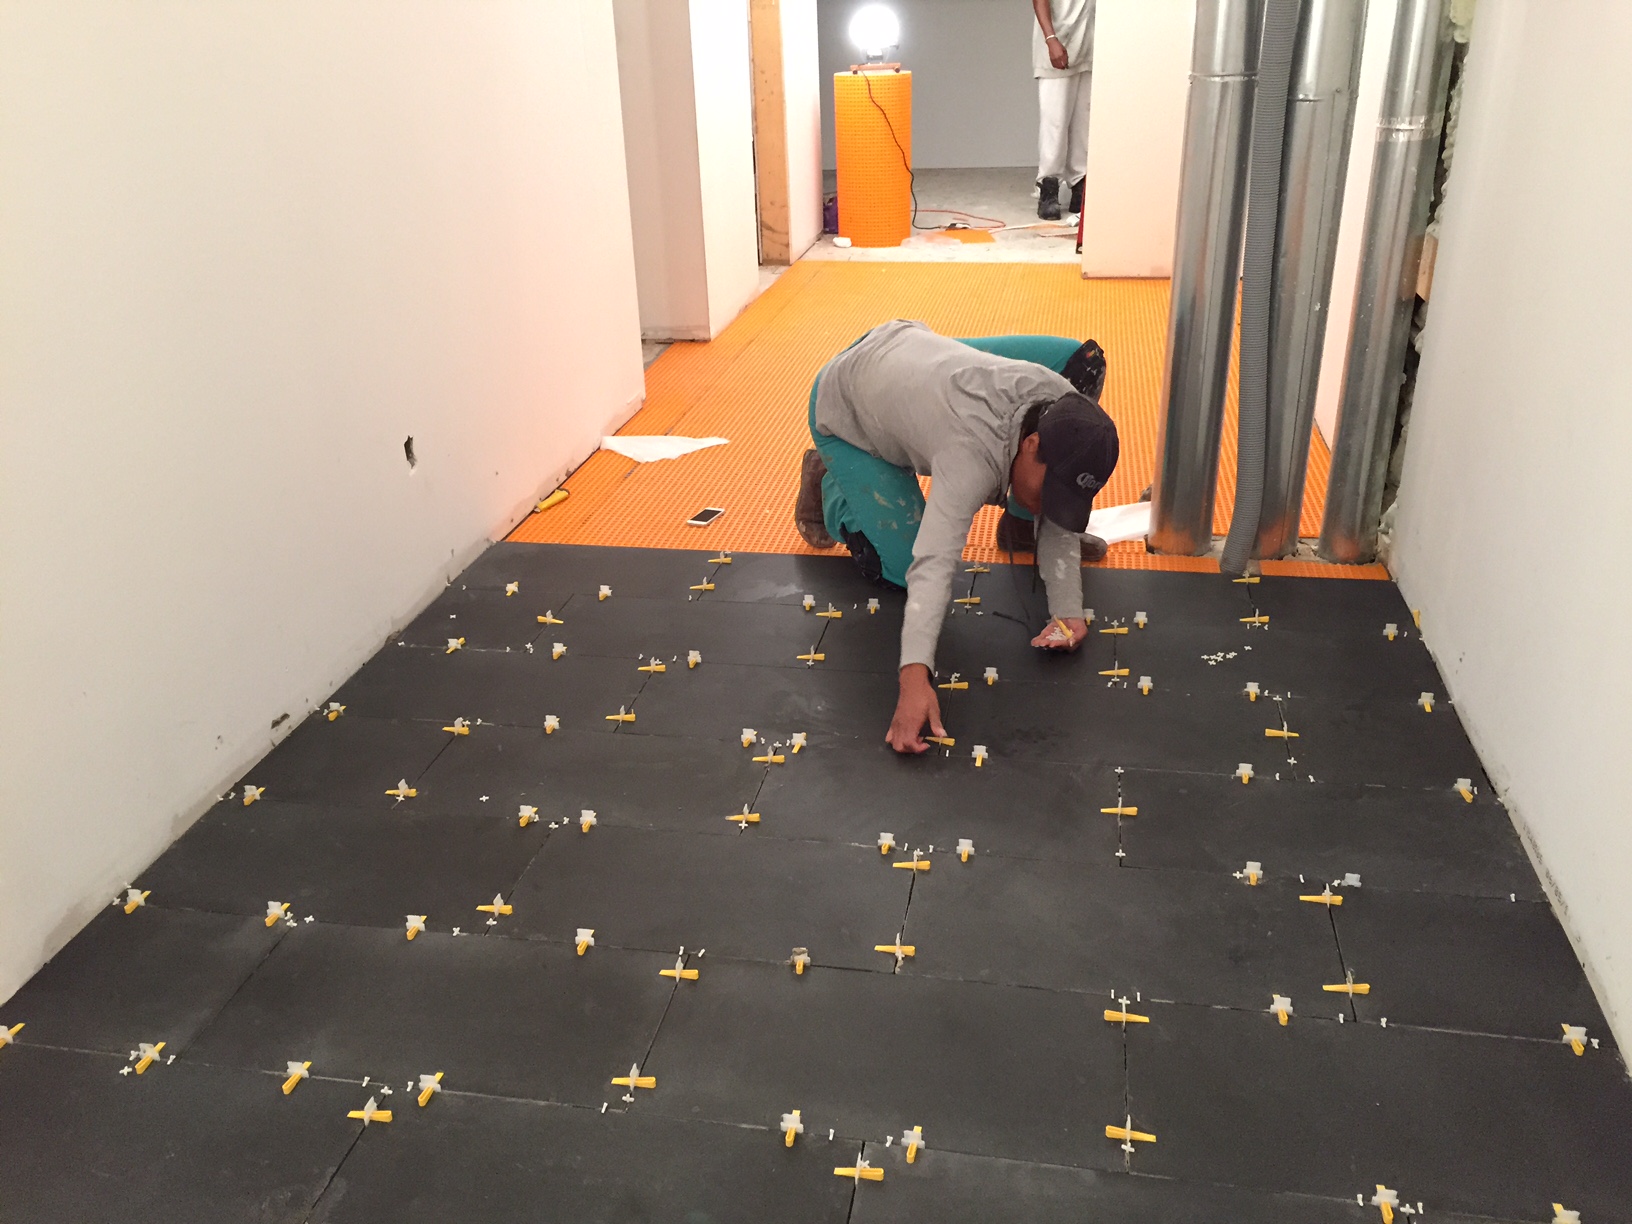
Soooo we’ve hit a setback with the tiling for Operation Organized Entryway. If you follow us on Instagram, you might have already seen this. Remember our beautiful honed grey basalt tile that I love and was ranting & raving over in our last post?? Yea….well…. here’s how it looked the next day once the tiles were set & we snapped off all of the leveling clips…
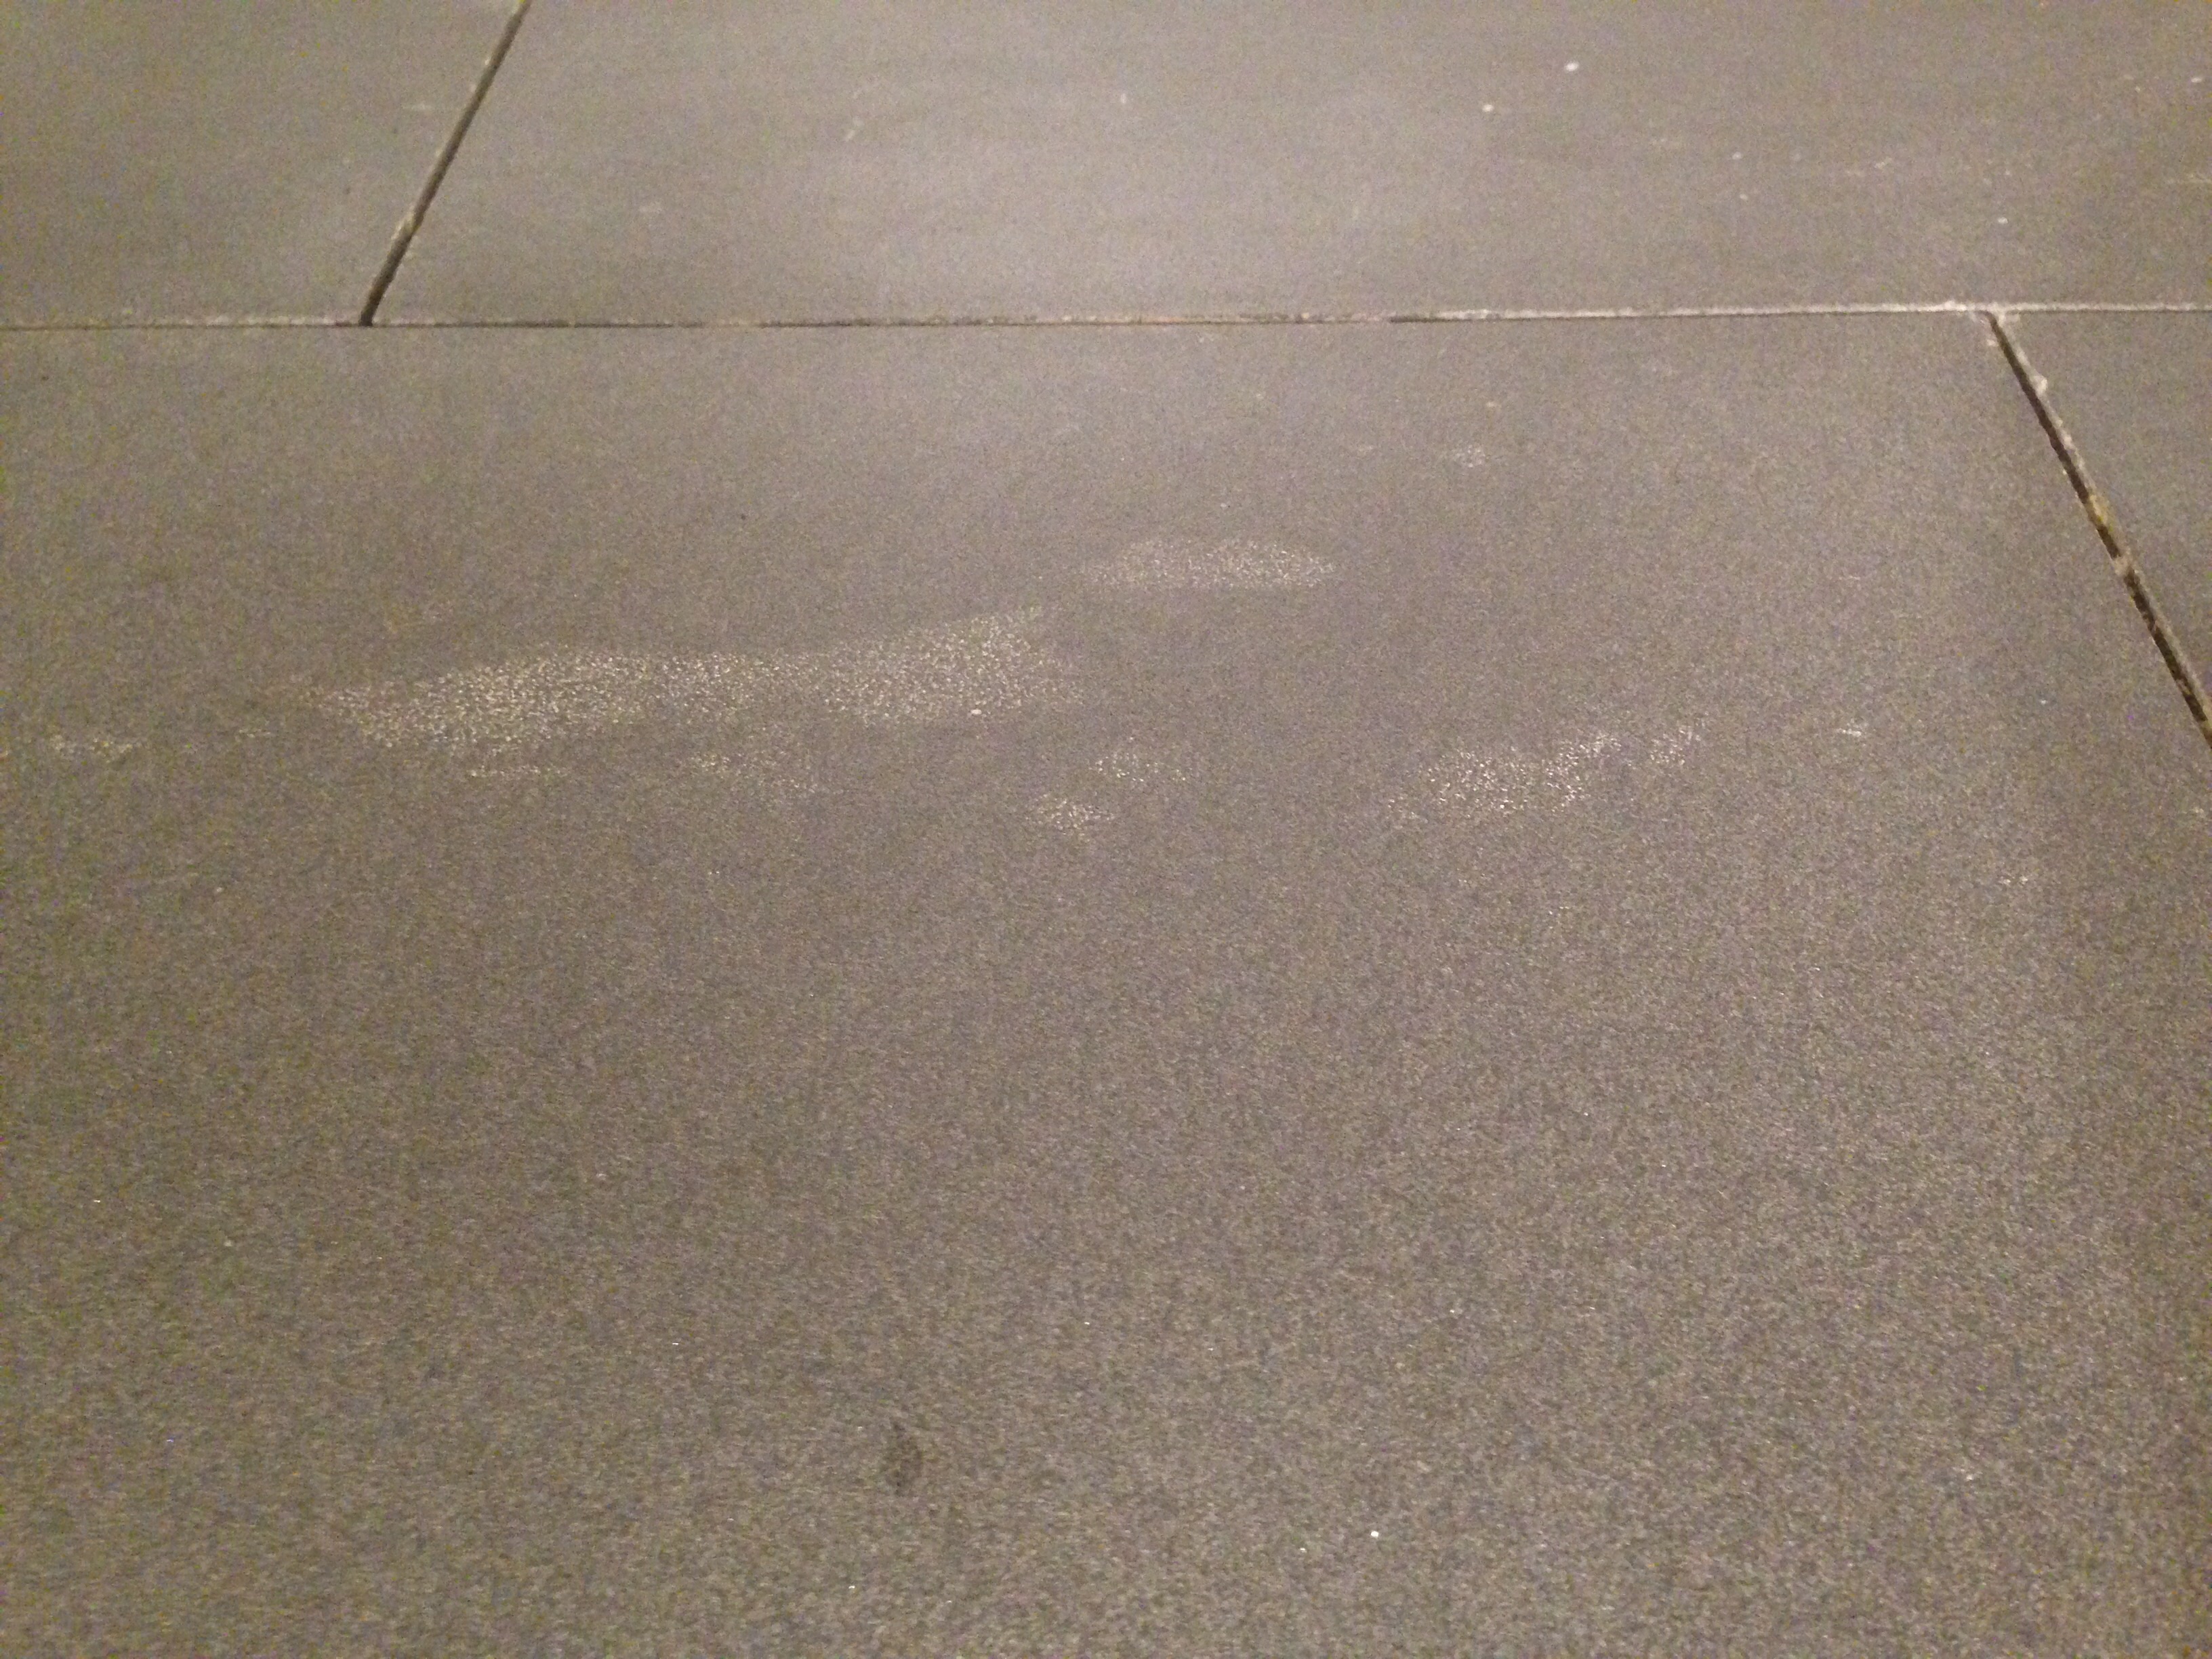
Ruined. See all of those splotches & discolouration?? No those aren’t “variations” in the tile. They’re stains. From EVERY. SINGLE. spot that a tiny bit of mortar happened to touch the face of the tile. I wish I had done more research on sites like Tilersplace!! UGH!
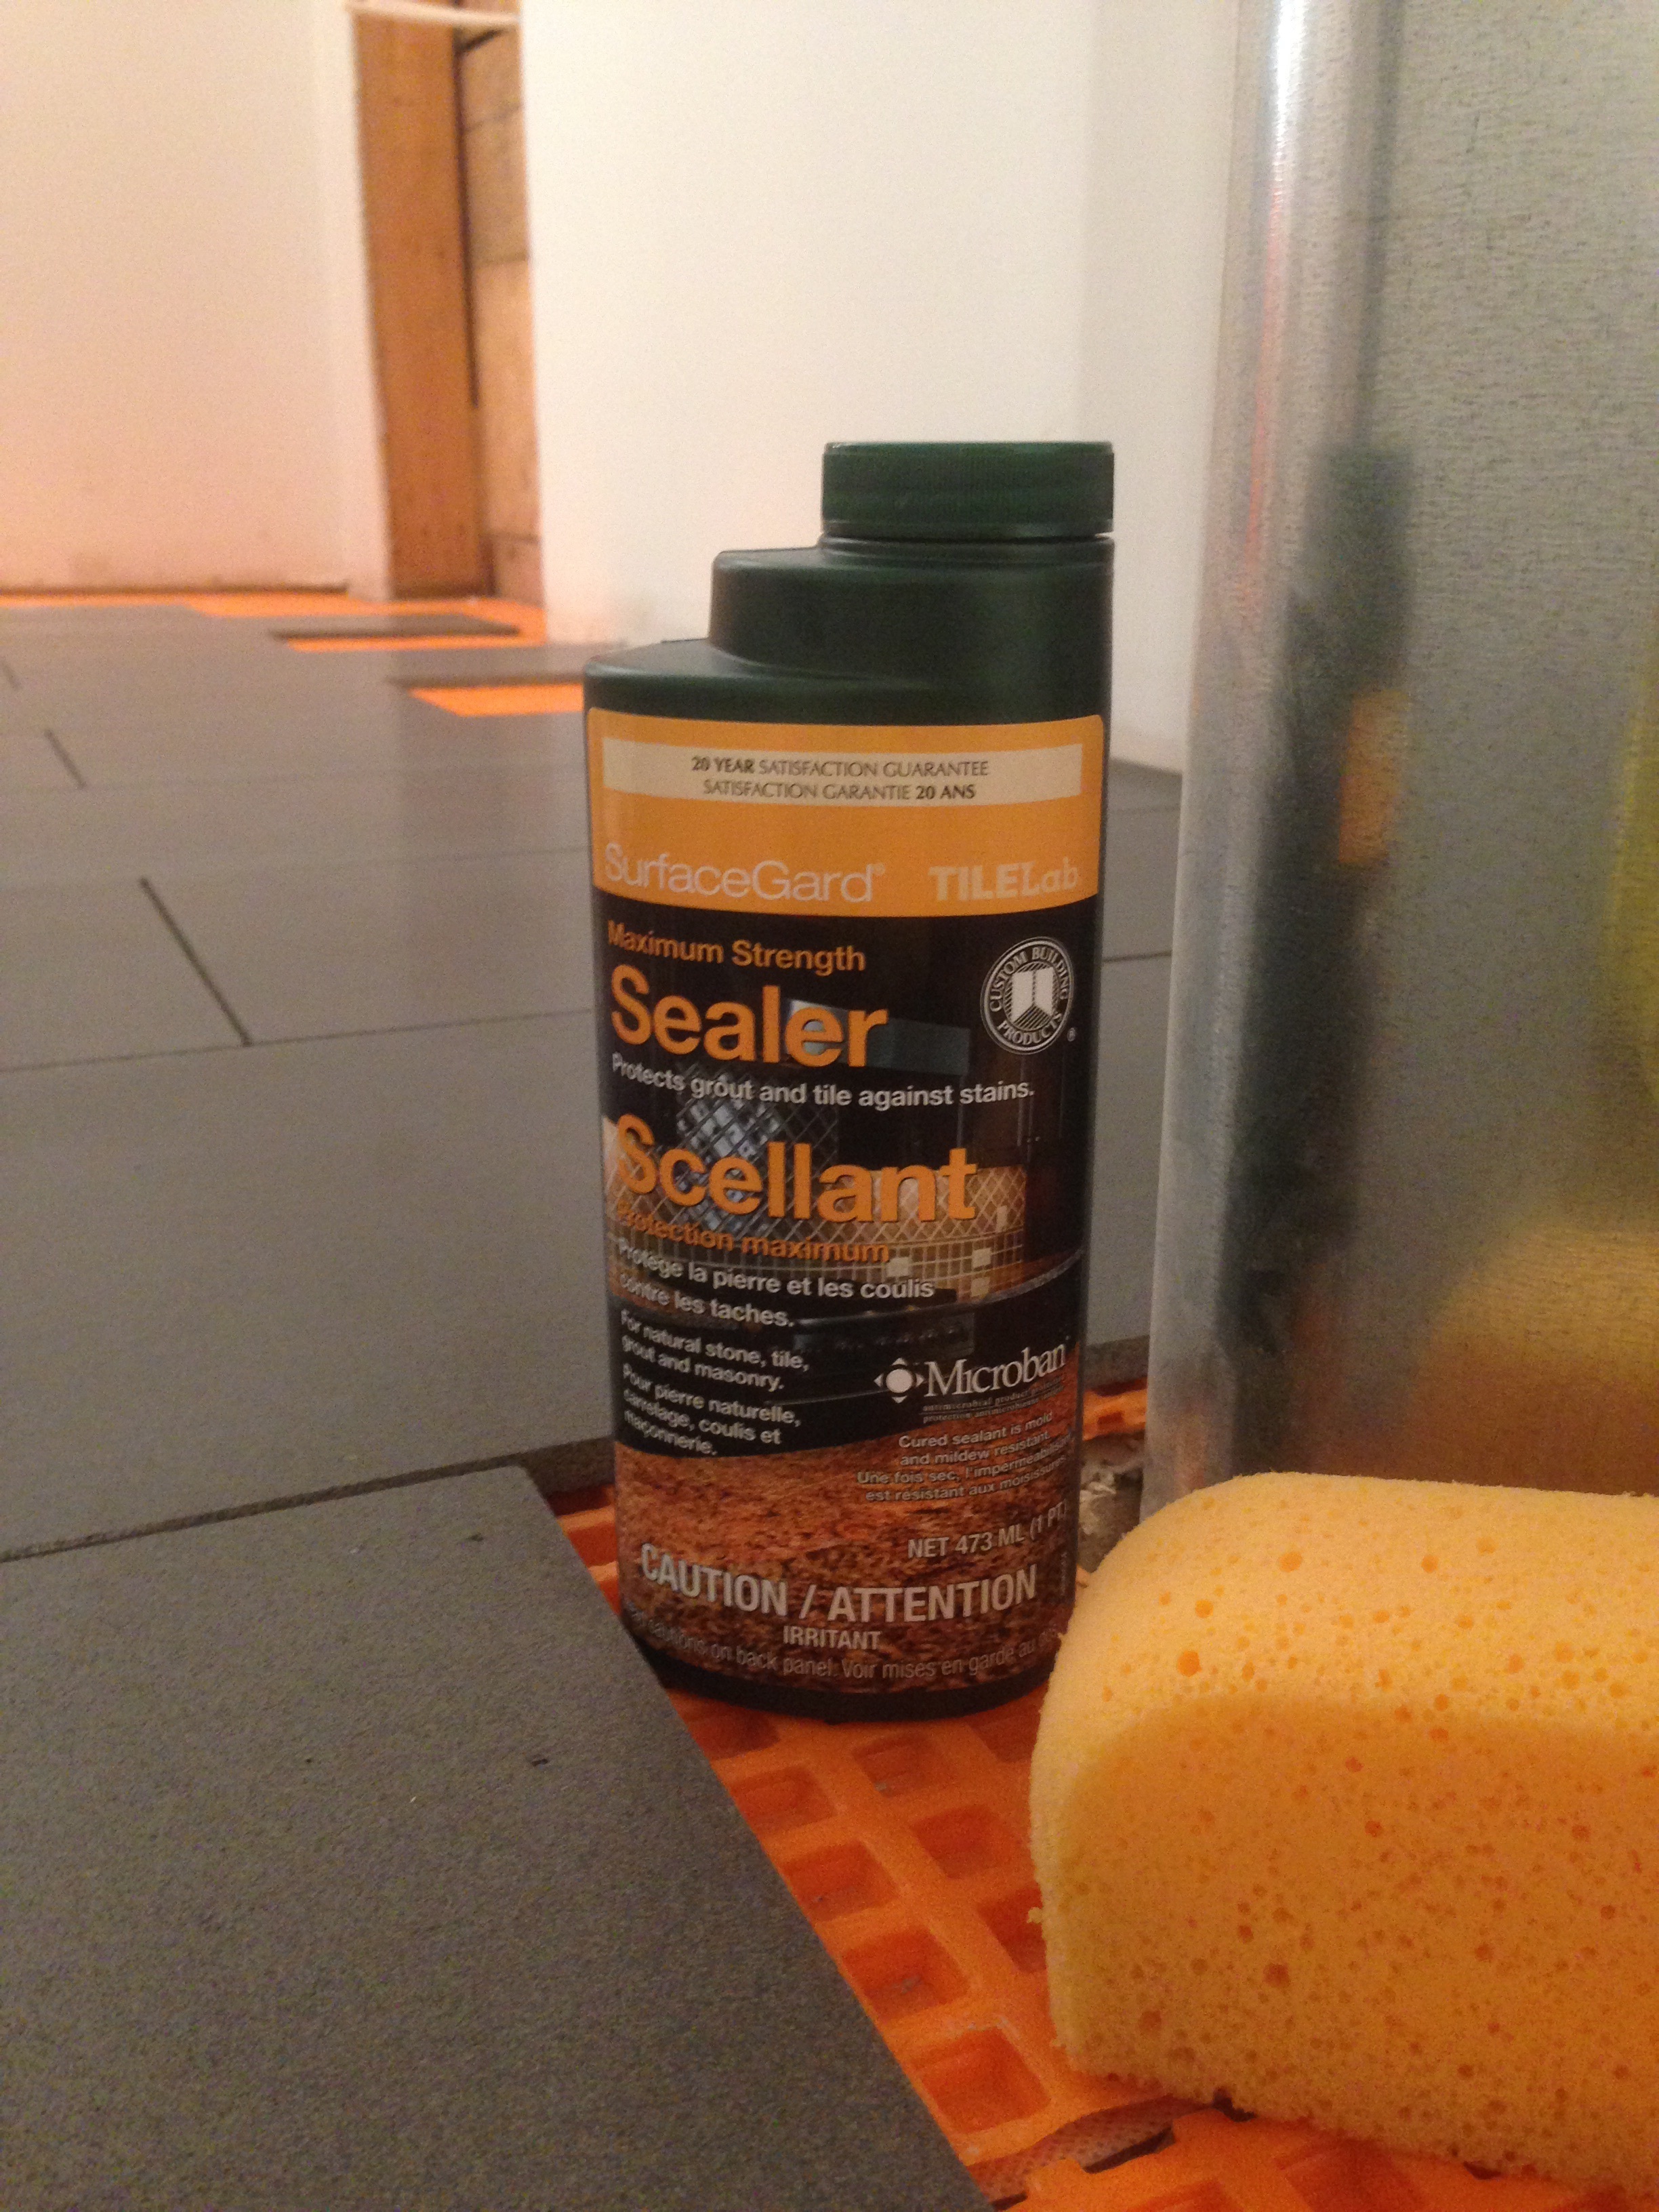
As it turns out, basalt, which is a natural stone made from volcanic rock, is a highly porous material. In most circumstances when dealing with natural stone tiles, it’s always recommended that you seal them prior to applying grout to prevent the pigments in the grout from being absorbed. Well it seems we probably should have sealed these tiles even prior to them being laid to protect them from being stained by the mortar as well. Fail.
The good news…we’d only gotten a quarter of the entryway laid when we realized the horror that was happening to our beautiful tiles. So we managed to save the rest & immediately began sealing them.

The rest of the tiles, dry fit & sealed
The bad news….when we originally bought the tile, our supplier only had a limited quantity of it; which happened to be just enough for what we needed. But now with roughly 50 sq. ft. of ruined tiles, we don’t have enough left to replace them AND complete the entryway. Awesome right?
We put in a call to our tile supplier to see if there is any chance they’ll be able to get more. We’ve got our fingers and toes (and everything else on our bodies that can be) crossed that they’ll get back to us with good news. Otherwise we’ll be forced to rip them up, find another tile for the entryway, and use the rest of the basalt in another smaller area of the house. Sigh…
The lesson in all this (if there is one)?? Always check, double check & triple check the tile material that you’re working with. If it’s a type that needs to be sealed & you’re even a slightly messy DIYer, it might be a good idea to seal them before you start laying them out to avoid a whole lot of headaches, wasted time & wasted money.
Have you ever had a major DIY fail? Leave a comment and let us know about it!

Sorry, the comment form is closed at this time.
Casey @waffling
I wonder if you can try some sort of stain removal thing. Ive seen lots of posts from people who stained marble countertops and were able to get it out
http://tipnut.com/marble-granite-stains/
I mean, worth a try, right??
Tash @ thedreamhouseproject
Thanks Casey. Yea, we did actually try a stain remover for natural stone, but it didn’t work & ended up leaving a residue on the tiles as well. So now they actually look worse than the pics above. 🙁
Meredith
Oh no!!! Good luck. I hope Casey’s suggestion works. 🙁
Tash @ thedreamhouseproject
Thanks Mere! Unfortunately it didn’t. We’re pretty sure our only choice is to rip them up. Still hoping our supplier will come through. Fingers crossed.
Kristen S
The finish of your tiles is matte, correct? What about trying to wet sand with a diamond pad in a rough grit? (too fine will polish it, even a rough grit may polish it a bit.) I hope you can find a solution, but sadly I fear the worst. If its anything like raw concrete, an oil or acid stain will never really come out, even with some aggressive sanding.
Oh, and for fails, I’ve got a good one! I once used a dirty rag to wipe off our dining table project prior to staining it. Once I applied the stain there was a huge visible swipe mark in the dark chocolate stain. http://www.storefrontlife.com/staining-fail/ To get it out, we spent two days sanding it, then re-staining. It looks beautiful now, but man was that a lot of work to re-do my mistake!
Tash @ thedreamhouseproject
Yea, it’s a matte finish but baby’s bottom smooth. I had thought of sanding, but was worried that I’d ruin the finish – though I guess it’s ruined anyway, so no harm no foul right? Lol. (I laugh to keep from crying…)
Oh – and I remember when you posted that one!! So glad it worked out in the end, but so much work to fix. Ugh..I knew if anyone you’d understand my frustration. Thanks for sharing (again).
Michelle @ Eamonn & Jack
I’ve got my fingers crossed for you that you can find more tile. As for personal DIY fails I’ve got piles. Handily my brain has a little quirk that blocks most of them from memory (probably so I continue DIYing stuff), but since I’m about to paint my One room challenge room I do recall the last time I tried to paint anything – I used a Paint+primer in one and it was a disaster. I will never make that mistake again – sanding off the clumpy paint and having to go out an buy primer took way more time than could ever be saved by combining the two steps
Tash @ thedreamhouseproject
Thanks Michelle. Will keep you all posted as things progress with finding more tile.
Oooh..that’s brutal. Paint + primer in one just seems like a bad idea. Glad to know for sure now to steer clear of that one!
KathleenC
Oh no! Will your built in cabinets cover any of the tiled floor? Can you save them whole as you tear them up and put the stained ones under the cabinets?
My fingers and toes are crossed for you too!!!
Tash @ thedreamhouseproject
Thanks Kathleen. Unfortunately there was no salvaging the tiles. We ended up having to rip them out which meant breaking them to pieces. We did save some square footage though by framing in the closet built-in first this time so we won’t have to tile under it.
Pingback: ORC Wk 5: Getting Back on Track | The Dreamhouse Project